Basically an SD card with WiFi. At one time there were even Transcend cards with OpenWRT on them, but they ran out quickly and I didn’t manage to get my hands on any of them. They were replaced by cards with an obscure chip from some weird lzeal. I managed to find a little to no documentation on them, except for a wild guess that there must be no embedded linux involved.
This stuff has very weird specifications. For instance, it doesn’t work in client mode – only in access point mode. There is no webdav and only a crappy web interface. In this post I decided to sum up the ways to make this thing at least more or less usable using common tools.
May be theres linux?
The first ezshare cards had linux on ’em. And these were my hopes when I got one a few years ago. Tried to root it, but it didn’t seem to work. Tore it apart, found no uart, a weird chip from lzeal and no embedded linux. Ooops. And the so the device went to the dumpster, since it was at that point broken beyond any recovery and I forgot about the idea for a while.
My second attempt.
Next time I was copying photos from the camera after a vacation, I decided to get myself such a card again. This time though I tried survive with its stock firmware. But the manual number of actions via WiFi was still more cumbersome than just putting the card in the reader and copying everything by hand. So what to do? That’s right, we’re going to need a couple of hacks. Namely:
- Can we make it work in client mode? Or work it around.
- Write a script that syncronizes everything
- …
- PROFIT!
Sounds like a good plan, let’s go!
Client mode when there’s none
After I failed to find any way to enable client mode, I decided to go the other way.
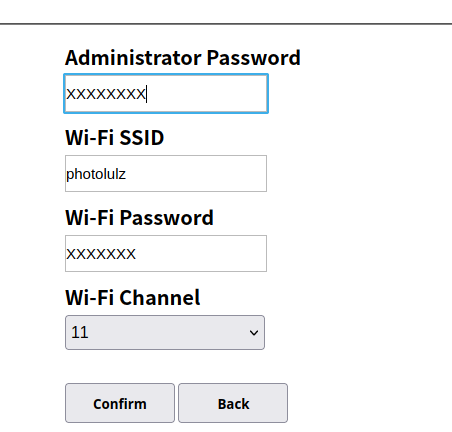
The card creates a default Ez Share network with password 88888888. The password to change WiFi settings is admin. Let it be here, may be one day this will help someone. The card sets IP address to 192.168.4.1, and distributes IP addresses from a /24 network. It is accessible also via DNS name ezshare.card. Let’s remember it and fill in the settings.
I picked the same WiFi channel as my router was running and by no coincidence.
Next, let’s go after WiFi settings. On the Wireless tab we need the WiFi adapter that’s working in 2.4Ghz spectrum. For that one we can add another network using the Add button.
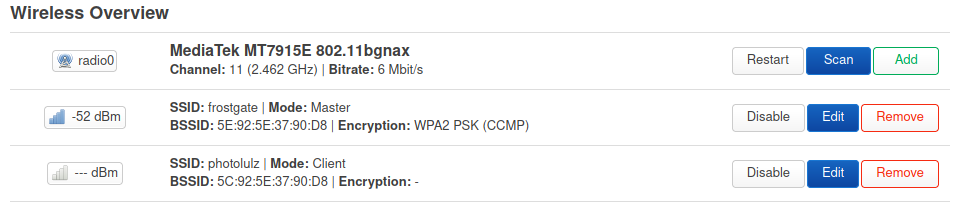
Pick the client mode, set the password and create the new network.
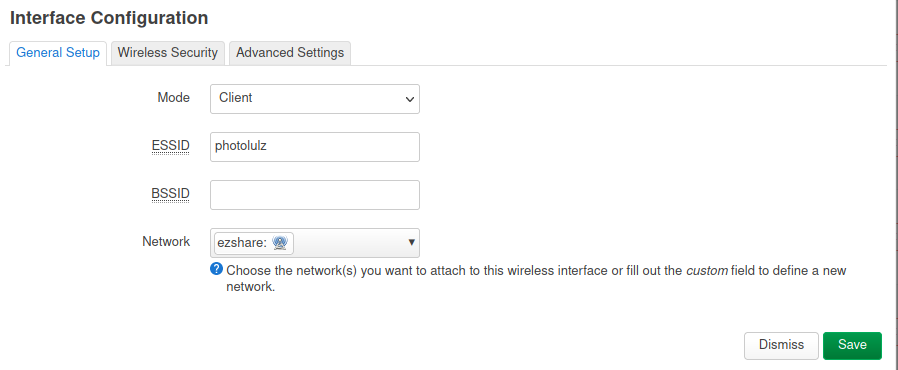
Now, from the interfaces tab, we can enabled DHCP client mode for that interface.
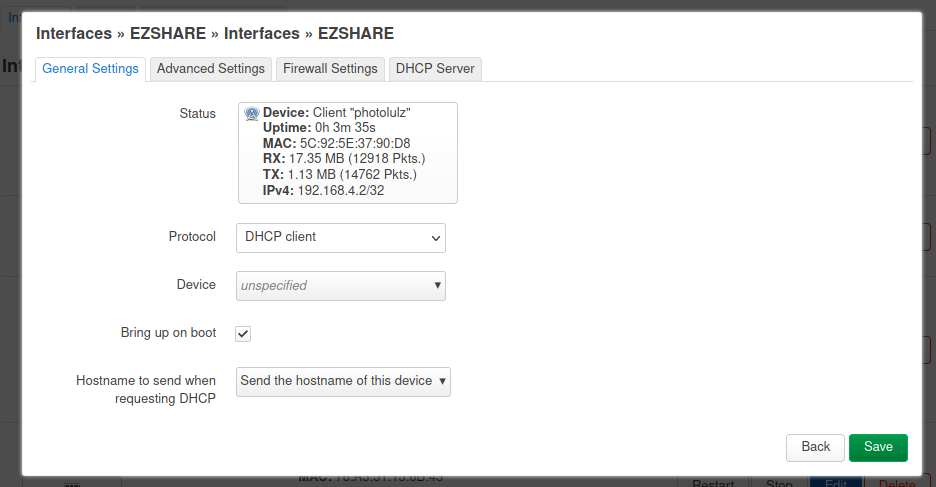
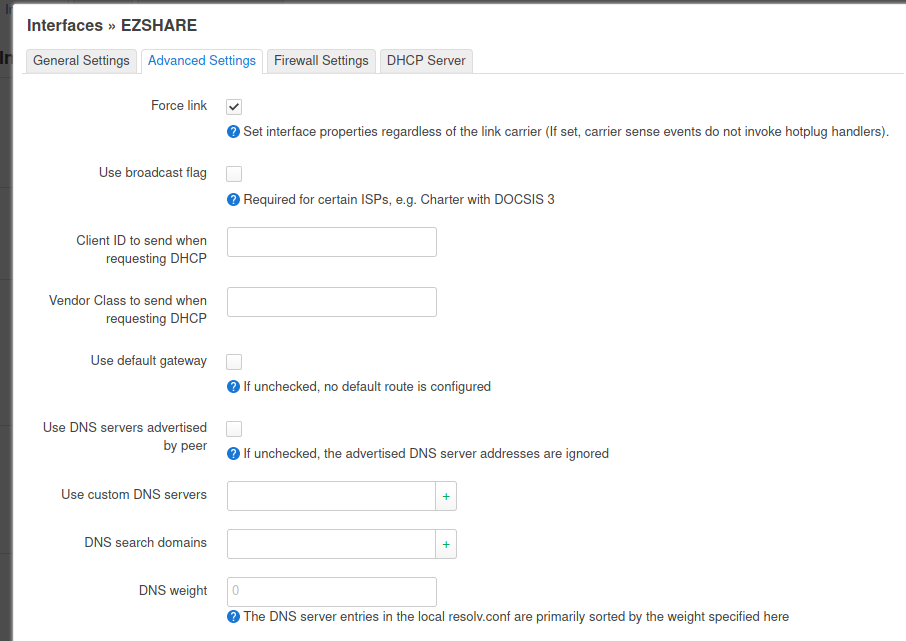
Now the tricks. In Advanced we’d better set Force Link (otherwise when the card is not online, all the VPNs will be down). Next uncheck Use Default Gateway since we won’t be getting internet from the card obviously. DNS is also not needed. In other words: Make it look like that:
Finally, let’s allocate a firewall zone for that. I called it ezshare. We’ll need masquerade, since the card only expects queries from the local subnet. That would look somewhat like that:
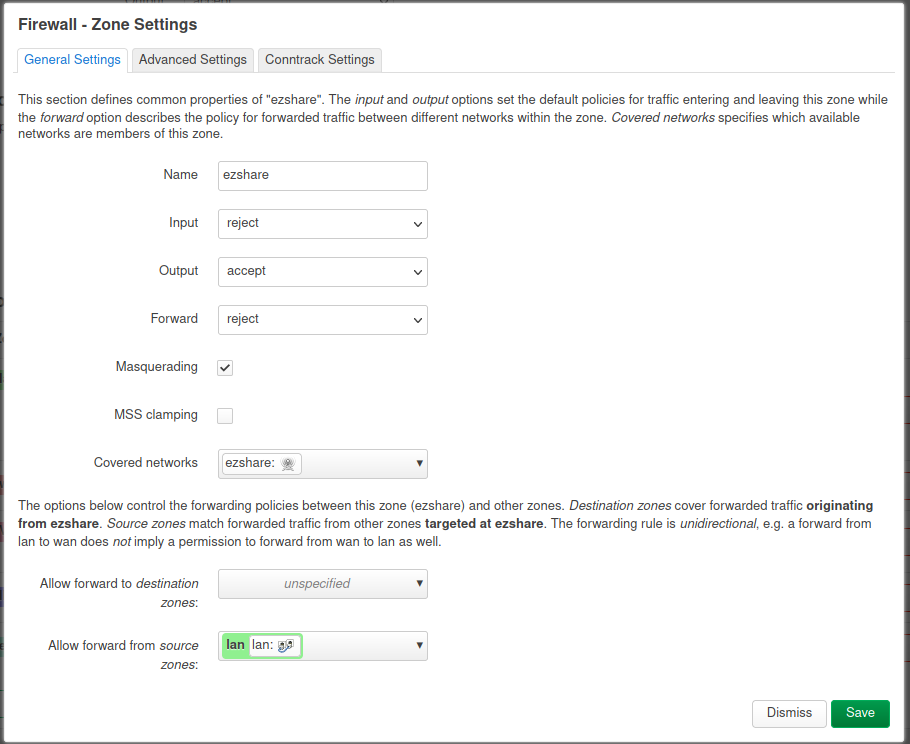
It’s really similar to a WAN inreface settings. Since I was pretty lucky, the subnet 192.168.4.0/24 was not allocated in by network. Otherwise the setup would be waaay more hardcore.
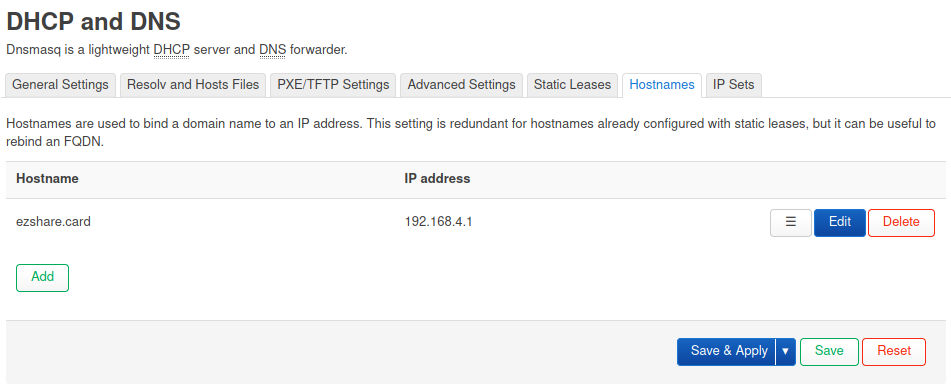
After doing that we can power on the card and any PC in the network can now ping the card. Let’s open the web interfaces and… FAIL! Seems like the page is addressing the dns name ezshare.card internally. So we either need it in our hosts file or…
Next let’s open up DHCP and DNS settings and just add it as static IP. Finally it works!
Making the sync work automatically
Now is the most fun part. After looking at a few bash scripts, I decided to write my own. The library and utitility is called ezshare-cli and is written in python.
It works like this:
You can install it via pip (pip install ezshare) or fetch it on my github: https://github.com/nekromant/ezshare
Bugz and fixes
The only problem so far – when your powercycle the card all WiFi devices disconnect and reconnect to the network. Some Wireless card don’t allow host and sta mode to coesist at all. But if there’s a space USB port or a space 2.4Ghz wifi adapter in your router that can work in client mode, you’re lucky! Just move the setup there.
Another useful option would be deleting the photos after sync. But, alas, that is not supported by hardware.
Autosync
To make the sync work fully automated, I deployed by sync tool to a docker container, mounted my nextcloud directory via webdav there and voila! Once the scripts detects the card in the network, it will fetch any files not yet copied. It ignores all the files with the same name and size. You can find a docker-compose.yml in the repository for a quick deployment.
The thing in the end does just what it is intended to do – it just works in the background. No actions required whatsoever. Noice!