I decided to describe in detail a proper replacement for Xiaomi Aqara Zigbee Gateway. CC2531-based and CC2538-based to be precise and gather all the relevant stuff about flashing and preparing those in one place.

So, initially I used a Xiaomi Aqara gateway along with homeassistant and even posted a note about how to use it without handing over all your valuable information to the Chinese Clouds
Since then my Zigbee network grew bigger and bigger and the Xiaomi Gateway was having a lot of trouble dealing with it. Time to switch to something different, right?
So, what was the limit?
When my network reached about 20-25 devices, the gateway started acting weird: loosing wifi connectivity and the delay to switch a light became more and more noticeable, typically 1-2 seconds, or even more. If a few places the range of the gateway was not enough to pass through the walls and I had to either deploy zigbee routers or look for an alternative.
Another pain in the ‘lower back’ was the way it worked with homeassistant, namely the developer mode that provided the integration with hass. It didn’t support some features of the devices, missed out a few events you’d normally want to use (e.g. click vs long press for switches) and some devices (zigbee led bulbs) were not supported at all via that mode.
Finally, there was the bad news about Xiaomi manufacturing regionally locked devices that were impossible to use with devices manufactured for a different region using the official Mi Home app or the official gateway. Why? As usual, to set different prices for the same devices in different regions and charge you extra.
So I scratched my head, ditched the gateway from my network (and put it up for sale on my ‘local russian ebay’), plugged in a CC2531 dongle into the SBS running HASS and fired up zigbee2mqtt.
СС2531 – Is the cheapest way to get your Zigbee network up and running. It costs just about ~5$ with shipping and has a ton of detailed flashing instructions.
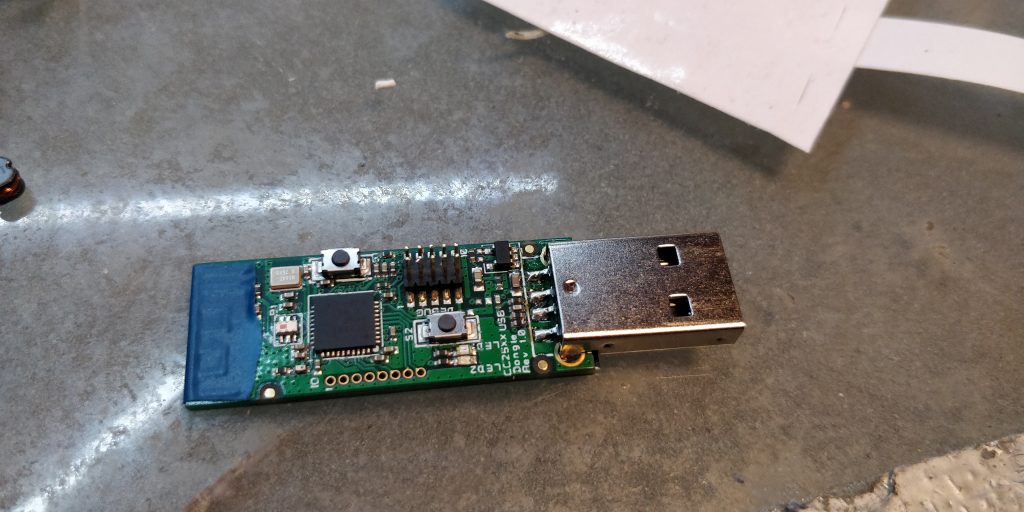
It comes with two firmwares with Z Stack Home: default and source routing. What’s the difference?
In simple words, default firmware can connect to more devices directly but doesn’t scale very well and occasionally runs out of memory on a large network with a lot of devices. Source Routing can connect only to five devices directly, but scales way better and can support larger network.
The theoretical maximum of 40 devices using default firmware turned out to be purely theoretical. The firmware ran occationally out of memory with my ~25 devices pretty often and the only way to fix that was to power-cycle the dongle. From the logs it seemed that a few noisy devices spammed the gateway to much and when they do that at the same time – bad things happen. Usually you’ll see in your zigbee2mqtt log something like this:
failed with status '(0x10: MEM_ERROR)' (expected '(0x00: SUCCESS)'))'And the only, albeit temporary fix would be a power cycle.
Or use the source routing firmware. You can read about the technology here. There’s a whole bunch of science under this name. But for a larger network you’ll need zigbee routers close to the dongle (outlets, zigbee switched with neutral wire and etc.)
in my case source routing changed things for the better, delays were worse than on default firmware, but still better that using original gateway. There delays on the bigger network were pretty random and sometimes would be awful, like you’ll have to wait for 5 seconds for motion activated light. That was pretty annoying, my network was pretty big and was expected to grow, so I decided to upgrade to a CC2538.
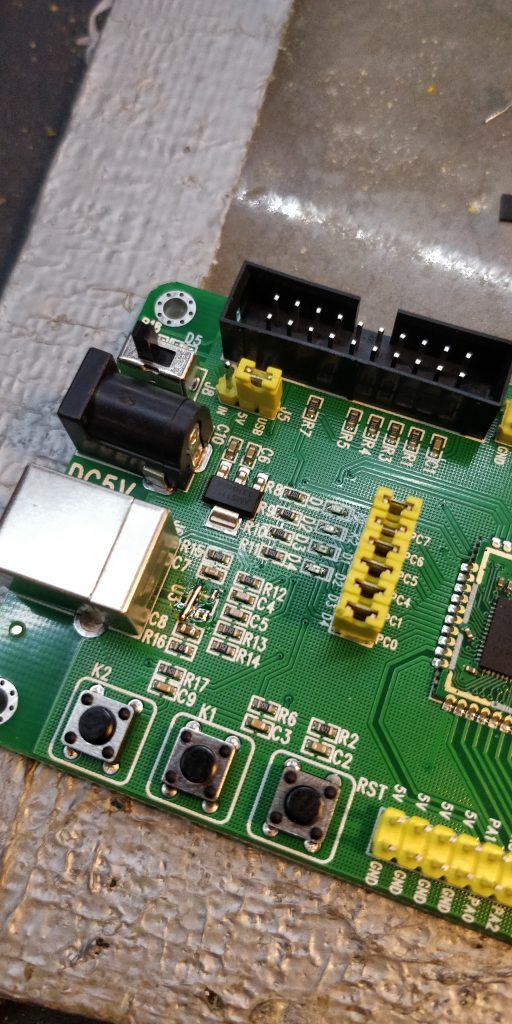
CC2538 is more powerful chip which has a whooping maximum of 150+ devices on one network. You can get it for the same 5$ as a module or for 30$ for a development board with USB. Since I was pretty much lazy, I decided to go the easy way and picked up this beauty from aliexpress.
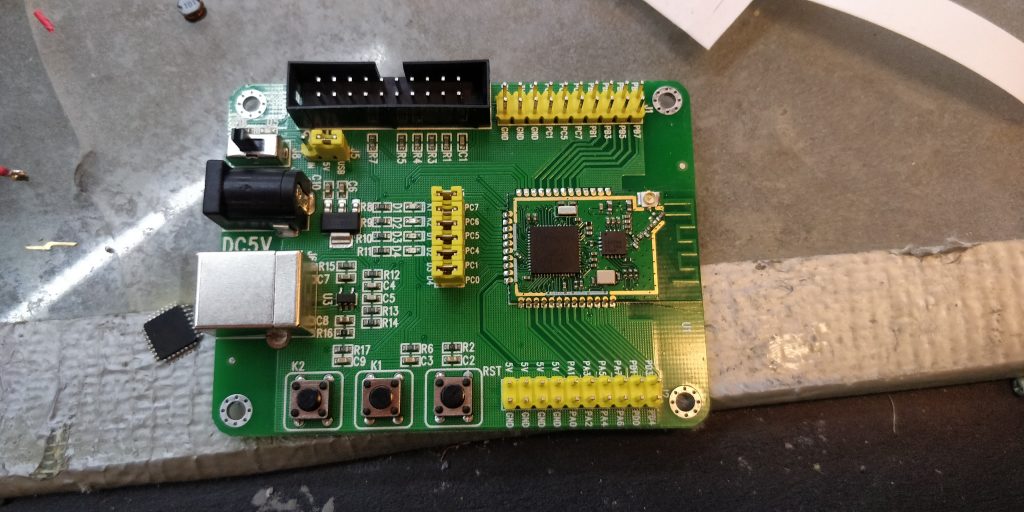
Getting CC2538 ready for action with some Mac’Gyvering.
Flashing the firmware
The very first step. Official documentation recommends us to use a Segger J-Link, that I didn’t have around. But I had an Orange Pi Plus, OpenOCD a USB-to-UART. The chip has bootloader that allows UART flashing, but it’s disabled by default (WHY!?). So we have to enable JTAG first.
The instructions were discovered pretty easy but I had to update it a little for my case.
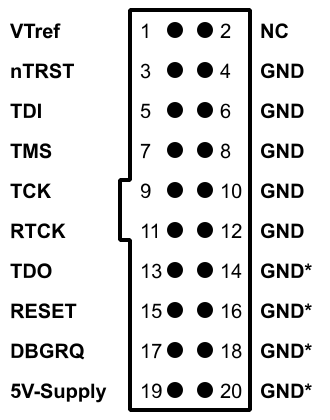
So, first of all we need some OpenOCD-compatible JTAG dongle. Any that supports JTAG and has 3.3 volts logic levels would do. The module has the following pinout:
- JTAG TCK = cJTAG TCK – dedicated TCK pin 47.
- JTAG TMS = cJTAG TMSC – dedicated TMS pin 46.
- JTAG TDI – PB6 (=pin 49)
- JTAG TDO – PB7 (=pin 48)
On the board itself you have a JTAG header with the pinout that fits Segger Jlink.
I hooked it to the GPIO pins of my Orange PI. Since the power was supplied with the USB cable from the very same Orange Pi I didn’t connect power, RESET can also be safely omitted. Next was the nasty task of figuring out the GPIO lines and filling in the OpenOCD config. Mine looked somewhat like that:
bindto 0.0.0.0
interface sysfsgpio

sysfsgpio_tdi_num 201
sysfsgpio_tdo_num 199
sysfsgpio_tms_num 198
sysfsgpio_tck_num 200

sysfsgpio_trst_num 202


transport select jtag
reset_config none

source [ find target/cc2538.cfg ]
So I saved the config and fired up openocd -f script.cfg, that allowed me to acces it with GDB and telnet.
At first I wanted to flash .bin with gdb, but something was off with flash commands, so I decided to go the documented way and just unlocked the UART bootloader with the following spell:
mww 0x400D300C 0x7F800
mww 0x400D3008 0x0205
The next step was very straightforward: Just rig a 3.3v UART to PA0(RX) и PA1(TX) и use the flasher from here:
./cc2538-bsl.py -e -w -v ~/Downloads/JH_2538_2592_ZNP_USB_20201010.bin After that we can plug the board into our server and go on with setting up zigbee2mqtt
Setting up Zigbee2MQTT
We’ll have to pair all zigbee devices with the gateway (again). If we previously used a cc2531 stick, we’ll have to change pan_id and network_key in the ‘advanced section’. It looks like it’s better to wipe everything from ‘data’ folder, except for the configuration.yaml after all.
Adding the following magic is also recommended as it drastically decreases response time:
queue:
   delay: 5
Building a network map
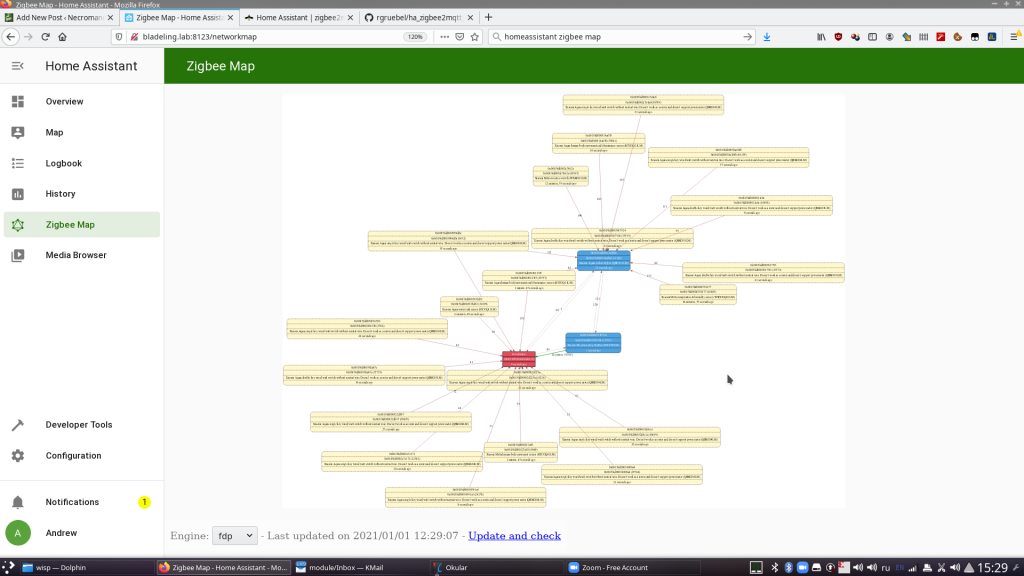
The good thing about CC2531/CC2538 is that we can build and display a network map right in HomeAssistant.I picked this implementaion. It looks great and helps a lot when deploying the network. With the stock app from Xiaomi you can as well go and do some fortunetelling.
Adding an external antenna
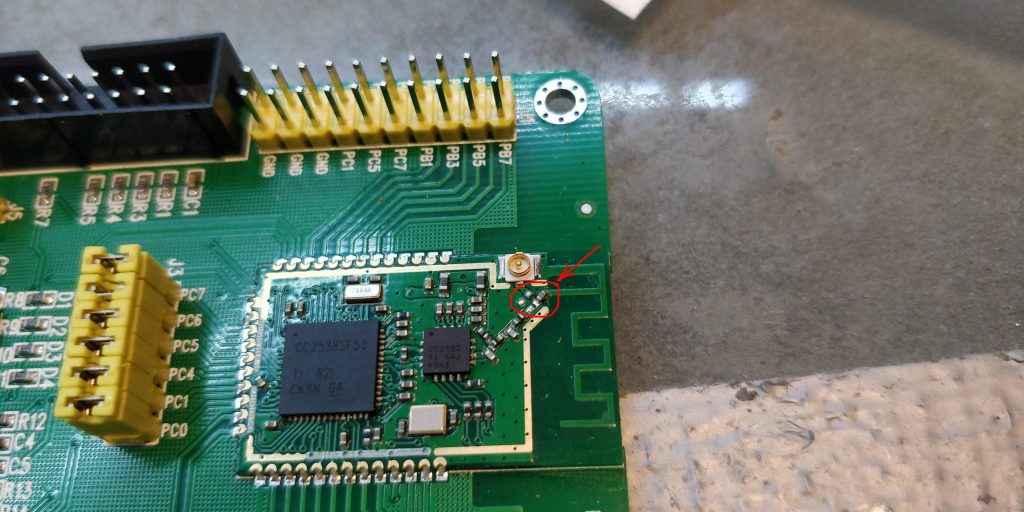
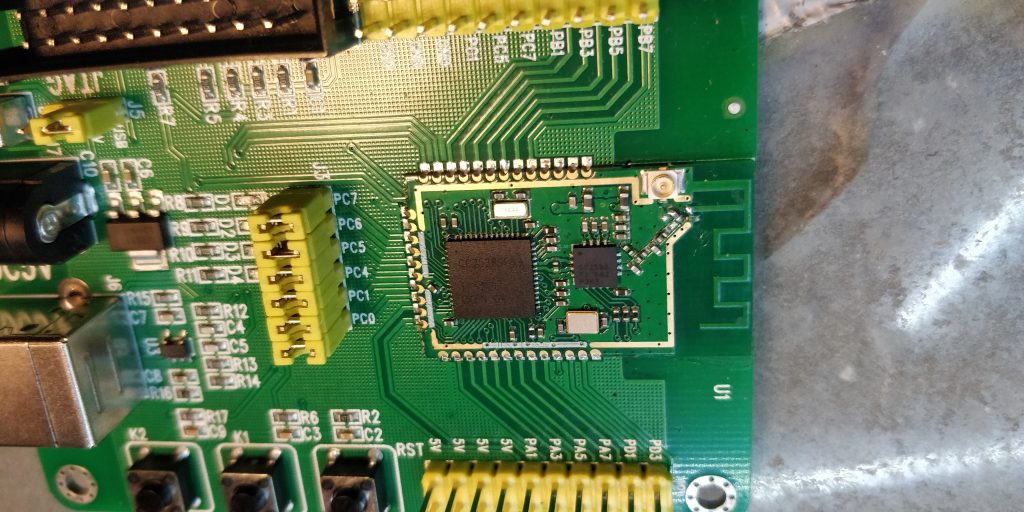
CC2538 has a PCB antenna and an IPX socket you can use to connect an external antenna via a pigtail cable. But to switch to the external antenna you have to resolder one small capacitor.
Fixing power issues (NEW!)
After this post went live, Juminu told me via email that this development board (also known as Sanmulink Board) has a bug in the power circuit (Huge thanks lettting me know!). You can read the detailed discuction here. When the board is getting its power via the USB cable we get 3.3 volts on the 5V rails and ~2.7 instead of 3.3 volts. Because of this we won’t experience ‘the glory’ of the blue LED and we’ll have worse signal quality. The proposed fix looks pretty much simple.
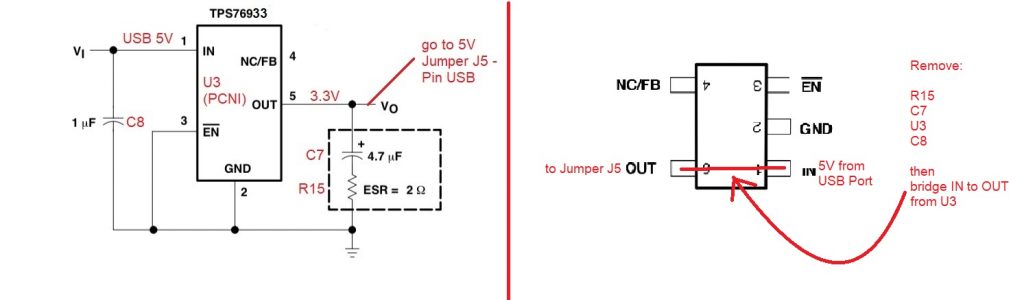
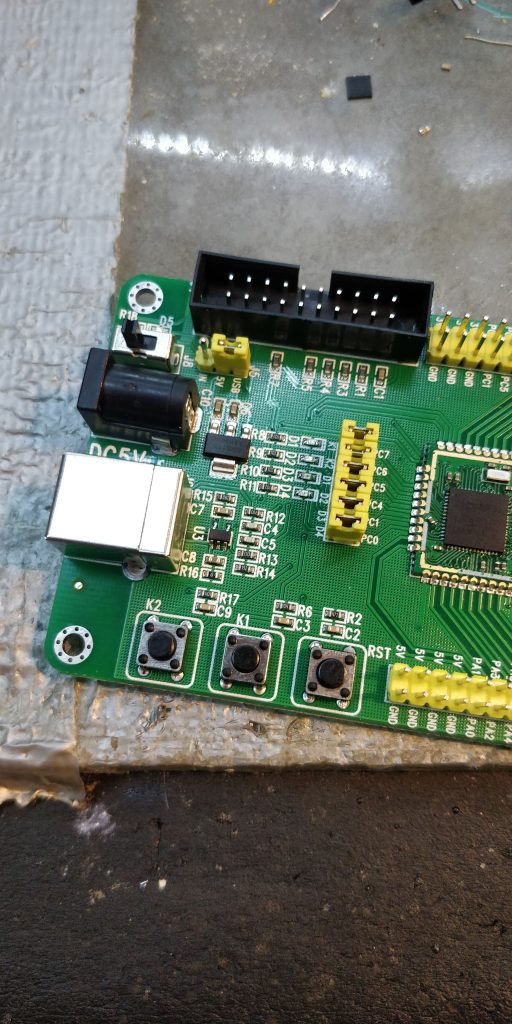
To fix we’ll have to remove a component and add a solder jumper.
The result was even further signal quality improvement. Even leak sensors in the basement, behind the reinforced concrete wall were now picked up directly by the gateway!
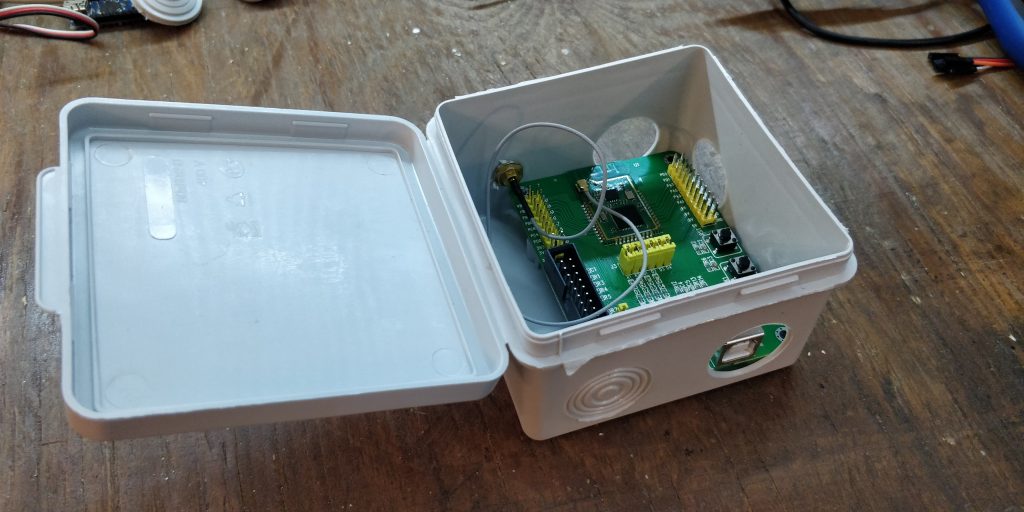
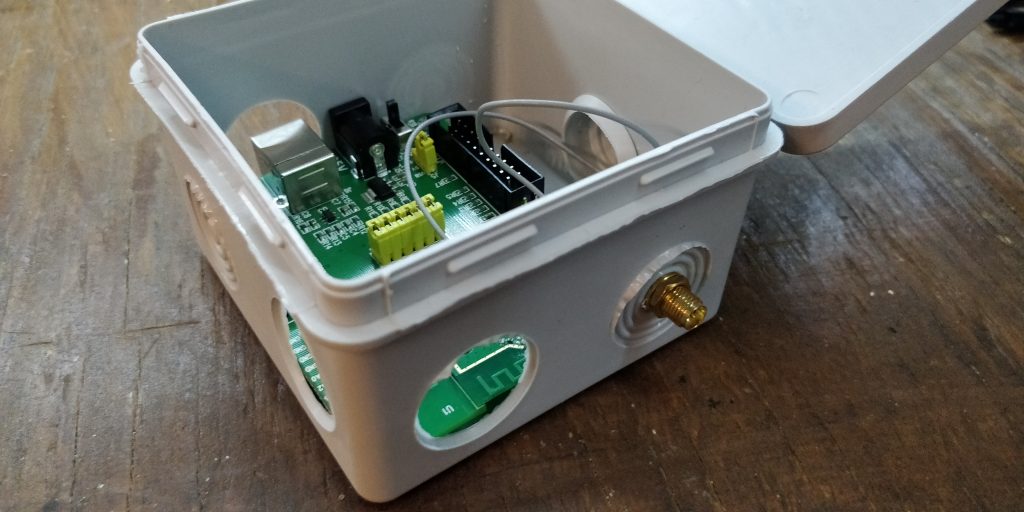
Getting an enclosure ready
This time instead of 3d-printing I fetched a nice’n’cheap 80х80 box from the nearest hardware store. It was a perfect fit, I only had to make a small whole for the antenna.
Summing up
The CC2538 handled my network with ease. The reaction times were down drastically to less than 100ms, or even less. I can’t even tell. Especially that was evident when gang-switching groups of lights. The coverage was also way better than when using the stock gateway. At this point I can say that this is the best option for organizing a zigbee network I’ve tested. And it has no vendor lock-ins, region lock and other crap.
Can you explain more about the “delay: 5” setting? What does it actually do?
Great info by the way! 🙂